
Views: 0 Author: Site Editor Publish Time: 2026-08-04 Origin: Site


Improperly wired electrical connections frequently cause severe system failures. They remain a leading culprit behind expensive equipment damage and devastating electrical fires. Poor wiring methods introduce unnecessary risks into any electrical setup. You might be organizing a complex industrial control panel. Or perhaps you are upgrading a high-draw 12V automotive audio system. In either scenario, you need centralized, secure connections. A dedicated distribution point creates cleaner, safer routing for all your circuits.
This guide breaks down the precise evaluation criteria you need for success. We cover essential safety protocols and step-by-step execution methods. You will learn how to prepare cables properly. We explain how to apply exact torque specifications. Following these steps helps you wire the component correctly the first time. Ultimately, this approach ensures long-term system reliability. It also guarantees strict adherence to crucial electrical code compliance.
Match the block to the load: Sizing your power distribution block based on maximum ampacity and voltage ratings is non-negotiable for system safety.
Torque is critical: Over-tightening damages wire strands; under-tightening causes arcing and heat buildup. Always follow manufacturer torque specifications.
Application dictates selection: Fused distribution blocks are essential for protecting downstream circuits (like in Car AV or specific industrial taps), while non-fused blocks serve purely as an electrical junction terminal.
Compliance matters: Adhering to standards (like NEC tap rules for industrial setups) prevents safety hazards and failed inspections.
When you rely on traditional point-to-point wiring, problems compound quickly. Technicians often cram multiple heavy-gauge wires into oversized wire nuts. This practice creates cluttered, chaotic control panels. It makes future troubleshooting incredibly difficult. These improvised splices also create high-resistance failure points. Heat builds up steadily over time. Thermal expansion slowly loosens the connection until an arc occurs. Poor wire management degrades overall system integrity.
A central component eliminates these major risks. Introducing a dedicated hub creates a neat, centralized electrical junction terminal. You gain a fully transparent and easily auditable connection point. Maintenance technicians can spot physical issues instantly. You no longer have to dig through bundles of electrical tape to find a fault.
The benefits extend far beyond simple panel aesthetics. Successful implementation delivers several measurable outcomes for your electrical architecture:
Reduction in physical wiring space: You achieve much cleaner control panels. Cable runs become logical, straight, and highly traceable.
Elimination of daisy-chained power leads: You stop passing full loads through multiple intermediate terminals. This prevents cascading voltage drops across long runs.
Simplified maintenance procedures: You can isolate single circuits effortlessly. A technician can disconnect one specific load for repair without disrupting the main power feed.
Preparation prevents catastrophic electrical failures later. You must evaluate your power demands accurately before buying any parts. First, assess your specific voltage and current requirements. Industrial setups usually involve high-voltage AC circuits. Automotive or marine applications typically run on 12V or 24V DC systems. You cannot mix these hardware standards safely. Always calculate your peak electrical load. The block's maximum ampacity must easily exceed the total combined draw of all output circuits combined.
Next, you must choose between fused and non-fused architectures. Fused blocks are absolutely necessary when you step down wire sizes. For example, you might run a heavy 1/0 AWG input cable. You then split it into multiple 4 AWG output wires. The smaller downstream wires cannot handle the main feed's full potential amperage. Without local fuses, a short circuit will instantly melt the smaller wires. Non-fused blocks serve a different purpose altogether. We use them when downstream wires already have separate external protection. They also work perfectly when you distribute identical wire gauges across all output channels.
Finally, verify material compatibility carefully. You must ensure the specific terminal block connector is rated for your exact wire material. Mixing aluminum and copper wires requires specialized components. Standard brass blocks will react poorly to aluminum. Look for an AL9CU rating to prevent dangerous galvanic corrosion between dissimilar metals.
Architecture Type | Primary Use Case | Primary Safety Benefit |
|---|---|---|
Fused Distribution | Stepping down large input wires to smaller outputs. | Prevents smaller cables from melting during a short circuit. |
Non-Fused Distribution | Splitting power across identical wire gauges. | Provides a clean, solid connection without adding extra resistance. |
AL9CU Rated Lugs | Installations mixing copper and aluminum conductors. | Eliminates galvanic corrosion and prevents joint failure. |
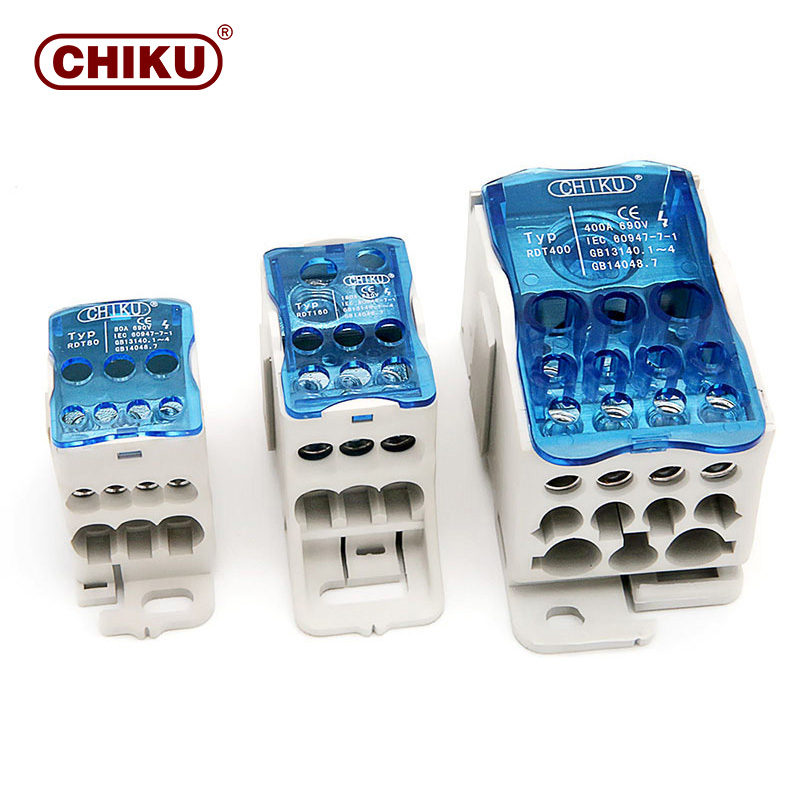
Executing a perfect installation requires methodical attention to detail. Skipping fundamental steps compromises the entire system. Follow this comprehensive process to wire your power distribution block securely and efficiently.
Step 1: Power Isolation and Safety Prep
Before touching any tools, disconnect all primary power sources. For vehicles, disconnect the battery terminals completely. For industrial panels, follow strict lock-out/tag-out procedures for the main breakers. Never assume a circuit is dead just because a switch is off. Verify zero voltage across all terminals using a calibrated digital multimeter. Your personal safety always comes first.
Step 2: Wire Preparation and Stripping
Route your cables carefully before making any cuts. Cut wires to exact lengths to avoid sharp bends. You do not want physical tension pulling on the connection points. Strip the insulation according to the block’s specific insertion depth. Do not guess this crucial measurement. Exposed copper should never protrude outside the terminal housing. Conversely, insulation should never be pinched inside the metal clamp. Pinched insulation causes massive electrical resistance.
Step 3: Seating and Securing the Connection
Insert the bare wire completely into the terminal aperture. We highly recommend using wire ferrules if you use fine-stranded cable. Ferrules prevent delicate strand breakage during tightening. They also ensure perfectly even clamping pressure across the entire conductor. Once seated, tighten the set screws. Use a precision torque screwdriver or a calibrated torque wrench. You must apply the exact torque specification listed by the manufacturer.
Step 4: Mounting and Routing
An unmounted block is a severe electrical hazard. Secure the unit firmly to a standard DIN rail or a flat back panel. Always use proper insulated mounting hardware. You must also ensure adequate physical spacing between your positive and ground blocks. Loose tools or dropped washers can easily bridge tightly packed blocks. Give them plenty of physical separation to prevent accidental short circuits.
Even experienced technicians make subtle mistakes during routine installations. These hidden errors often remain dormant until the system reaches peak electrical load. Let us examine the most frequent implementation risks and how you can prevent them entirely.
Many installers use aggressive set screws directly on fine-stranded wire. Doing this without protective wire ferrules is a major operational mistake. The twisting metal screw easily tears through delicate copper strands. This unseen damage instantly degrades the wire's total ampacity. It reduces the current-carrying capacity and creates dangerous thermal hotspots due to increased resistance. Always use properly crimped ferrules for any fine-stranded cables.
Many people believe "hand-tight" is a sufficient measurement standard. It is not. Hand-tightening provides zero measurable consistency across multiple connections. All electrical junctions experience natural thermal cycling. As current flows, the metal expands slightly. When it cools down, it contracts. Over time, this daily thermal cycling will cause under-torqued connections to vibrate loose. Loose connections arc, generate intense heat, and cause electrical fires. Buy a proper torque screwdriver and use it on every lug.
Sometimes an installer tries to connect a massive wire into a much smaller terminal lug. They might trim outer copper strands just to make it fit inside the hole. Never do this under any circumstances. Forcing an oversized wire into a small lug compromises safety immediately. It also directly violates fundamental electrical codes. If your wire is too large, you must buy a larger block or use an approved step-down adapter.
Grounding often becomes a dangerous afterthought. Failing to establish a dedicated ground block creates massive system issues. Your ground distribution block must be identically sized to your positive one. Inadequate grounding leads to terrible ground loops in sensitive audio systems. In industrial settings, poor grounds can cause deadly equipment chassis electrification. Treat the negative side of your circuit with the exact same respect as the positive side.
Completing the physical wiring is only the first phase of the job. You must validate the installation thoroughly before returning the equipment to regular service. Rigorous inspection guarantees your work remains safe for years to come.
First, you must navigate local building code requirements. For commercial and industrial installations, you must reference the National Electrical Code (NEC). Pay special attention to specific NEC tap rules. These rules dictate exactly how feeder lines and smaller tapped lines must be protected. They govern maximum allowable wire length and required ampacity protection standards. Passing your local electrical inspection requires strict adherence to these specific regulatory guidelines.
Next, perform a thorough visual and mechanical inspection. Conduct a firm "tug test" on every single wire connection. A properly torqued wire will not budge at all. Inspect the immediate area around the block for any stray copper wire strands. Look closely at the insertion points to ensure no compromised insulation is visible. Everything should look incredibly tidy, uniform, and professionally secured.
Finally, conduct your continuity and voltage drop testing procedures. Clear all metal tools from the immediate area. Re-energize the system safely following your initial safety protocols. Use a digital multimeter to test for voltage consistency across the entire block. You must perform this test while the system operates under a normal electrical load. A significant voltage drop across the terminal indicates excessive resistance. If you see a voltage drop, power down immediately and re-torque the affected connections.
Wiring a power distribution block safely is not a complex mystery. It comes down to basic electrical discipline. Your success depends entirely on precise component selection. You must perform rigorous cable preparation before making connections. Most importantly, you must adhere strictly to manufacturer torque specifications. Skipping any of these fundamental steps invites catastrophic component failure.
Your next step is clear and actionable. Before beginning any physical installation, audit your current system thoroughly. Calculate your peak ampacity across all active circuits. Gather the correct gauge wires and proper terminal ferrules ahead of time. Finally, source a heavily vetted, fully compliant distribution component. Make sure it perfectly matches your specific operational environment, whether you manage a factory floor or build custom vehicles.
A: Yes, if you are reducing wire size from the input to the output. The smaller output wires require fuse protection matched to their lower ampacity to prevent fire hazards.
A: No, unless the specific terminal block connector is explicitly rated and certified for multiple conductors per lug. Doing so otherwise prevents proper clamping and creates a severe fire risk.
A: While often used interchangeably, a distribution block typically takes one large main feed and splits it into multiple smaller outgoing circuits, whereas a standard junction terminal simply joins two or more wires of the same size inline.
A: Highly recommended, especially for fine-stranded wire (common in automotive/marine audio). Ferrules keep strands bundled, prevent the set screw from severing copper, and provide a superior electrical contact area.


